
Masking with Watercolor
Watercolor is my favorite art medium to use, because I love how the colors can flow and blend together. The element of surprise is always a part of painting with watercolors because often the paint will move in ways you didn’t quite expect. As you use watercolors more, you can begin to predict and control the paints better. Today I am going to show you one of my favorite watercolor techniques to get shapes with crisp edges.
First, you will need contact paper, which is clear paper that is sticky on one side. I found that it works best to have new contact paper, as older rolls may lose some stickiness over time.
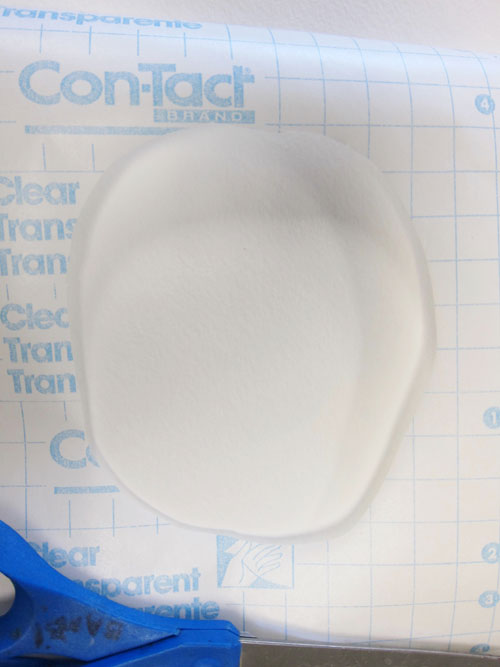
Cut out a large shape from the contact paper. Peel and stick to your watercolor paper. Cut a smaller shape to place inside the cut out space. Wherever the sticky paper is placed the paper will remain white after you are done painting.

Make sure the contact paper is smoothed down and firmly stuck to the paper. Start painting the white space with watercolor paints. I like to lay down a little bit of water, then place drops of colors on the water and watch the colors spread.

The contact paper will resist the watercolor paint and protect the white space of the paper.

After the paint is dry, remove the contact paper to reveal the crisp edges. With this cloud shape, some of the paint seeped underneath the contact paper, because the older contact paper wasn’t sticky enough. I added splatters to make it look more intentional.

Here are a few more examples of this technique.
This is a teardrop shape made by placing contact paper in the center.
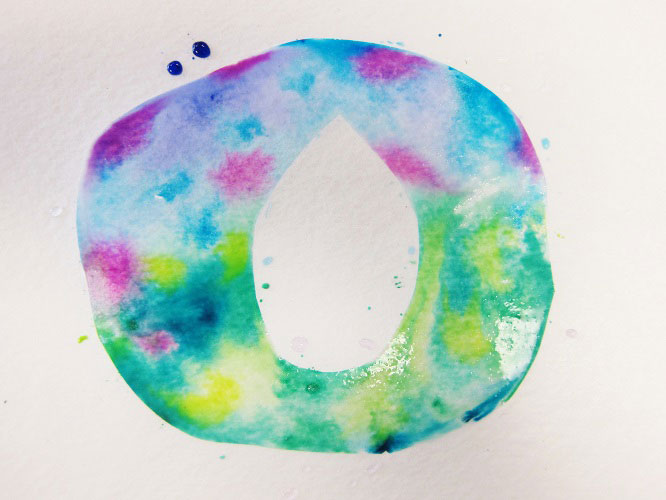
Here is what it looks like after the contact paper is peeled off.

I printed off some words using a fancy font to use for reference.

Then, I used black marker to draw the word “Hope”.

Honestly, I’m not entirely happy with how the word “hope” came out, but that’s okay. I just think that every time I play around with art materials I learn something new and enjoy myself.
Finally, I made a watercolor shape with the word “Dream” inside. Again, I used the contact paper to block out the white shape in the center, along with contact paper around the outside.

Then, I sketched out the word “Dream” using a computer printed word as reference.

Finally, I used watercolor paints to color in the letters and add some extra doodling.
I hope you learned something new today and I hope I have inspired you to try your hand at some watercolor painting or lettering! Have a fun Quirky Dutch Summer.
~ Marcia Beckett ~
Art is Basic
Etsy


5 comments
Thanks for the delightful tutorial. I had never thought of using contact paper. Your "dream" piece is so beautiful.
love this! I will share this (and where I got it) with the local art journaling women's class that I teach. And with my nieces.
Lovely and looks like a fun technique, must give it a try. Thanks for sharing.
Thank you for sharing this wonderful process!! Very pretty work!! Love the Hope one too!
Hugs Giggles
cool technique. never would have thought of using contact paper. really pretty.
Post a Comment