Showing posts with label stickers. Show all posts

Background for My Art Journal


Playing with a background in blocks of color..

book page
gelli prints
tissue paper
acrylic paints


These are two examples for an art journal project I'm doing with my 3rd graders.  We used large vinyl letter stickers (that were donated to the art room) and cut them into shapes and lines.


After the shapes are stuck to the page, color in the negative spaces with watercolor paints.


Gel pen designs can be added to the top of the stickers.


I have a few fun links around the internet to share with you.


Art is Basic website
My Art
Etsy Shop
Pinterest

Sticker Inspiration

Here are some ways you can use sticky things in your artwork! 

Hang things! via Pinterest

Here, I used washi tape to hang my daughter's artwork!  The mind of a 3 year old...

Hang masking tape from your ceiling.   
Ok, that's not really practical, but it sure looks cool in an art installation!

Easy Washi Tape greeting card from NoBiggie.net

Gorgeous taped letters from Corey Moortgat:  I seriously LOVE all her stuff!

Washi tape silhouette art via My Sister's Suitcase

Just go crazy and fill a page with stickers.  Tacky, gaudy, but oh so fun!
Image via Weheartit

Create a taped wall!  Image via Molla Mills

Mix and match leftover stickers to speak your mind from Lisa Moorefield

Use up stickers on shoebox lids for your wall!

Check out the other posts in this series about using your stickers and tapes in art journal pages:

1.  Sticky Inspiration
2.  My new stickers & some pages with them
3.  Using patterned tape in an art journal page
4.  Guest Post:  Marly Martinez
5.  Tape Lines artwork
6.  How to Create Your Own Stickers Using Picmonkey
7.  Sticker Art Inspiration 
8.  Cutting out shapes from tape
9.  Guest Post:  Chandra Newton
12.  Guest Post:  Rachel Mims


Art is Basic website
My Art
Etsy Shop
Pinterest

Sticky Journals Guest Post: Rachel Mims


Guest Post:  Rachel Mims

I sent out 6 packets of stickers to 6 different artists and throughout the summer I will share with you what they have created.

I have been following Rachel Mims' blog for awhile now and it is so interesting to see what she does in her art therapy classes!

Here is what she wrote at the beginning of June:

"Today is June 1st - the 1st day of ICAD.  Did you make your card?  I made mine:


And then I put it in my art journal.  I started doing that last year - using the cards as part of my art journal pages - and really liked it so I am going to do it again this year.  Here is the page:

Of course, the card and that tab at the bottom (which came off of some junk mail) both open up.  I did some extra writing under the ICAD but not the tab.  Here is a picture of them opened up:


Do you see the stickers that I used?  This art journal page is FULL of them.  There are luggage tags from a trip (or 2?) that I took on American Airlines, a name tag from a dinner I attended, washi tape and stickers from Marcia Beckett.  Marcia is hosting a sticky journal challenge/guest artist challenge! As part of this series on her blog, http://marciabeckett.blogspot.com, she sent me a package of stickers:


That's a lot of stickers, right?  I am really excited about using them!!!  So, that is why I got started right away!!  I got the stickers yesterday, I used them today.  Today I just used the stickers that matched my page... I tend to do that - stay in a color scheme.  Also, for some reason those number stickers really spoke to me.  I already know when I am going to use my other yellow 66 sticker!!"

**********************************************************************************

Check out the other posts in this series about using your stickers and tapes in art journal pages:

1.  Sticky Inspiration
2.  My new stickers & some pages with them
3.  Using patterned tape in an art journal page
4.  Guest Post:  Marly Martinez
5.  Tape Lines artwork
6.  How to Create Your Own Stickers Using Picmonkey
7.  Sticker Art Inspiration 
8.  Cutting out shapes from tape
9.  Guest Post:  Chandra Newton


Art is Basic website
My Art
Etsy Shop
Pinterest

Sticky Journals: More circular stickers, Giveaway Winner and 21 Secrets

Sticky Journals:  Here is a detail shot of a way to layer stickers!  I started with a gold foil stickers on the bottom, then layered a circular journal sticker, a green polka dot sticker, a turquoise circle cut from sticky paper and a little pink flower on top. 


And now for the giveaway winner of a huge pile of sticky goodness!! 

WINNER:

Congratulations to  Blogger kluckingbear who said...

Totally cool! Count me in and THANKS!!!

Please email me your address and I will send out your stickers.

Thanks everyone who commented and played!

**********************************************************************************

Also, I wanted to share with you that 21 Secrets art journaling workshop is having a Christmas in July sale with a reduced price for registration.  I've been having a lot of fun watching all the art journaling tutorials.  Check out their website here:   http://bit.ly/10idr19


**********************************************************************************

Check out the other posts in this series about using your stickers and tapes in art journal pages:

1.  Sticky Inspiration
2.  My new stickers & some pages with them
3.  Using patterned tape in an art journal page
4.  Guest Post:  Marly Martinez
5.  Tape Lines artwork
6.  How to Create Your Own Stickers Using Picmonkey
7.  Sticker Art Inspiration 
8.  Cutting out shapes from tape
9.  Guest Post:  Chandra Newton


Best wishes, Marcia
Art is Basic website
My Art
Etsy Shop
Pinterest -->

Sticky Journals: Add doodling to stickers & Link Up


Tip for Art Journaling with Stickers:


Add doodles on top of the stickers to add your own personality to them.  In this page I made a couple months ago, I took a plain brown sticker, added the pink heart sticker on top, then added black outlines and white gel pen lines.


Have you made anything with stickers lately?  I'd love to see it!


Check out the other posts in this series about using your stickers and tapes in art journal pages:

1.  Sticky Inspiration
2.  My new stickers & some pages with them
3.  Using patterned tape in an art journal page
4.  Guest Post:  Marly Martinez
5.  Tape Lines artwork
6.  How to Create Your Own Stickers Using Picmonkey
7.  Sticker Art Inspiration 
8.  Cutting out shapes from tape
9.  Guest Post:  Chandra Newton


Best wishes, Marcia

Art is Basic website
My Art
Etsy Shop
Pinterest -->

Sticker Art Inspiration


Check out the other posts in this series about using your stickers and tapes in art journal pages:

1.  Sticky Inspiration
2.  My new stickers & some pages with them
3.  Using patterned tape in an art journal page
4.  Guest Post:  Marly Martinez
5.  Tape Lines artwork
6.  How to Create Your Own Stickers Using Picmonkey

Since I have been writing about stickers and making art with stickers, I have begun to notice sticker art everywhere.  Once you are thinking about something, you start to notice it more.

Doodler's Anonymous had a feature about Naomi Vona. 
She has some really intriguing artworks with tape and stickers.  Check out her flickr account.

Writing on masking tape from AllMyMetaphors

Wow, this is an amazing art tape party!  I would so love to do this!

Phoenix Peacock created this colorful card inspired by Sticky Journals


Beautiful cards made with washi tape, watercolor and doodling by Bonita Rose

Sticker Collage wallpaper via Babyology

Also, I love graffiti sticker art:

I hope some of these pictures have inspired you to see stickers in a new way!

Art is Basic website
My Art
Etsy Shop
Pinterest
 

How to Print Your Own Stickers Using Picmonkey

Keeping with the theme of stickers, today I'm going to show you one way that I've made my own stickers.  First, I went to the Avery website and tried their label maker.  The letters and the sizes turned out all wonky when I went to print them.  So instead I tried Picmonkey and that turned out much better.  You can use their whole site to edit photos and collages for free.  There are premium options as well to add more fonts and graphics. 

Materials: 
1.  Start by opening a collage in Picmonkey.  Choose one of the layouts.  I chose Biggie Smalls.  It doesn't really matter too much, because you can place your cursor on the edge of the squares and drag them to change the sizes.         


2.  Change the bottom setting to 2550 x 3000 pixels.  That would be the size (at 300 dpi) for an 8.5 x 11" piece of sticker paper.  You will have to click the little lock button on the side in order to allow it to change proportions, otherwise it will stay in a square shape.


3.  Next, click on the photos icon (which is the top one).  Click on "open photos" and choose photos from your desktop to upload.  I picked some of my artwork. 


4.  Drag your photos to the boxes.  You can drag photos into the spaces between the boxes.  Watch what happens when you do that.  It will add more spots to your collage.  Change the sizes of the pictures by dragged on the edges of the pictures.  I don't think you can zoom in or out on the pictures, which drives me nuts.

Click on the background icon.  You can change the spacing in between the circles, and make the corners rounded.  Here you can also change the background, but I left mine white.

5.  The Swatches tab allows you to add patterns instead of a picture.  I added a few swatches in between my photos.  I wish there were more patterns to choose from!


6.  Here, you can see my masterpiece taking shape.  I added my swatches and changed the sizes of my photos.  Now, save your masterpiece to your computer.  I saved it as a "Sean" size.  That is the largest file size. 

7.  After you save it, click on the "x" in the top right corner.  Then, go to edit a photo.  Your photo collage thus far should be there.  If not, just upload the one you saved.  Now, you can add text and overlays.

Click on the Overlays icon and you can add fun doodly hearts, stars and shapes.  At this point, I am really tempted to pay for Premium!  Drag some fun designs on to your stickers.


8.  Finally, click on the "P" on the left, the text icon.  Now you can add words if you'd like.  There are some very fun fonts here.  The orange crown next to the text shows the ones you can get if you pay for it.  Sigh.  So tempting! 

9.  The last step is to save your file.  Then, load up your sticker paper in your printer and print off your file.  Yay!  Now you have stickers!  Your stickers can be any shape or size, because you will cut out each shape individually.

I hope you've enjoyed this post.  Stickers are so much fun.  Add them to your art journals, mixed media artwork, scrapbook pages, greeting cards or whatever!


Check out the other posts in this series about using your stickers and tapes in art journal pages:

1.  Sticky Inspiration
2.  My new stickers & some pages with them
3.  Using patterned tape in an art journal page
4.  Guest Post:  Marly Martinez
5.  Tape Lines artwork

Linking up to:


Art is Basic website
My Art
Etsy Shop
Pinterest
-->

Sticky Journals: A Journal Page with Tape & Link Up

Welcome to the first weekly link-up for the summer of Sticky Journals!

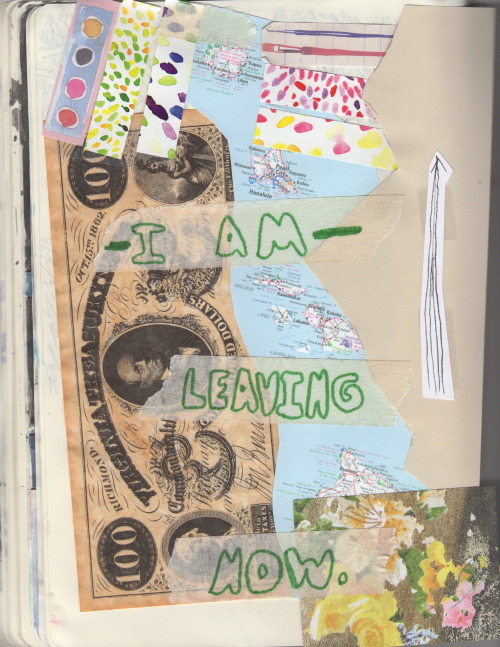
I like to use patterned tape as a decorative element in my art journal pages. 

In this page, there is polka dot tape at the top and bottom of the page.  The rest of the page was made with watercolor paints, a print from a texture plate, collage elements from a vintage children's book, rub-on letters and rub-on flourishes.
Do you use stickers or tape in your artwork?  If you have any sticky art to share, please link up below!

Loading InLinkz ...


Art is Basic website
My Art
Etsy Shop
Pinterest